 \
\
\
Setting up a Rectangular Patch Antenna in Sonnet
In this application note, we look at the design and model setup issues for a bottom fed, rectangular patch antenna. Sonnet Lite 11.55 was used for these slides so the example could be used by the widest audience. Please refer to the "Antennas and Radiation" chapter in the Sonnet User's Guide for important information about setting up radiation problems in Sonnet.
All references to antenna design were taken from: " Microstrip Antenna Design Handbook," by Garg, Bhartia, Bahl, Ittipiboon (ISBN: 0-89006-513-6, Artech House, www.artechouse.com)
In this section, we design a simple bottom fed, rectangular patch based on the " Microstrip Antenna Design Handbook." This is an extremely useful book (with many references) which provides information on a wide range of planar antennas.
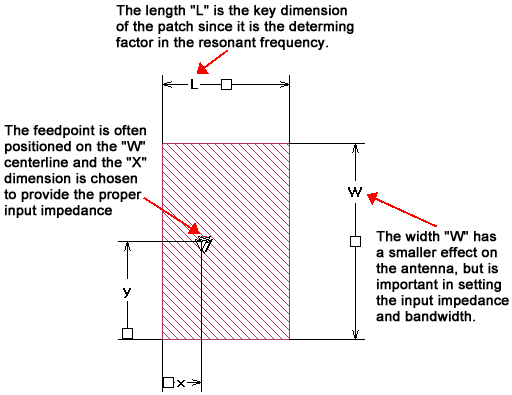
Calculating "L"
The parameter "L" of the patch antenna sets the resonant frequency of the patch. From the equation 4.24 on page 266:
L=c/(2fr*sqrtEr)
where c is the speed of light (11.803 when the units are inches and GHz)
fr is the resonant frequency of the patch (we use the value 3 GHz for this example)
Er is the Er of the substrate (we use the value 2.2 for this value)
Using these values yields a value of 1.326 inches for "L" which we round to 1.300 inches.
Determining "W"
The W/L ratio typically falls within a range of 1 - 2. For this example, we use a W/L ratio of 1.5. Using this ratio makes W=1.5 X 1.300 = 1.95. We will round off and use the value 2.0 for W.
Determining the Feed Point
Y is normally set to the centerline of the W dimension while X can be approximated by equation 4.78 (which assumes 50 ohms) on page 289:
Xf = L/92*sqrt(Ere*L)
Ere is the effective permittivity, which for this example we will assume is 2.0 rather than computing the value. Using the L value computed above (1.326 inches) yields an Xf value of 0.4.
Since Sonnet uses a shielded analysis technique, you must take extra steps in order to model radiating structures. These are outlined in the "Antennas and Radiation" chapter in the Sonnet User's Guide and are also discussed below. This section assumes that you are generally familiar with Sonnet's project editor and how to create a structure using the project editor.
Antenna Model Setup Conditions
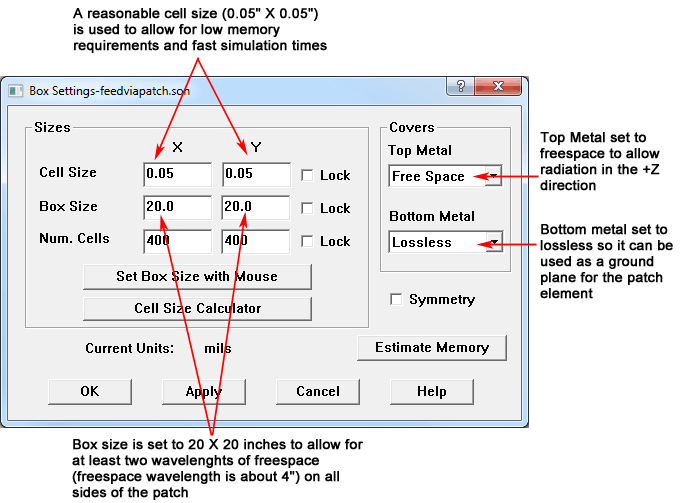
First Condition: Make both of the lateral substrate dimensions greater than one or two wavelengths.
Second Condition: Make sure the sidewalls are far enough from the radiating structure that the sidewalls have no affect. Usually two to three wavelengths from the sidewall is sufficient.
Third Condition: Place the top cover outside the fringing fields (i.e., near field) of the radiating structure, preferably a half wavelength.
Fourth Condition: Set the top cover to Free Space.
Fifth Condition: The radiating structure can not generate a significant surface wave.
Box Settings
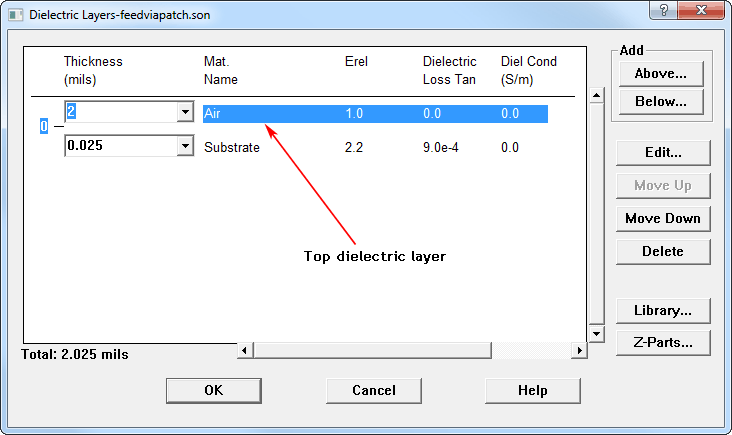
Dielectric Layers
The Dielectric Layers dialog box (Circuit => Dielectric Layers) is shown below. The top dielectric is set to air and the thickness is roughly one half wavelength at the resonant frequency (3 GHz).
2D Top View
The 2D top view of the circuit is shown below. Notice that the box size is much greater than the patch. Please also keep in mind that the box size is also the substrate size4e and the bottom ground plane size.
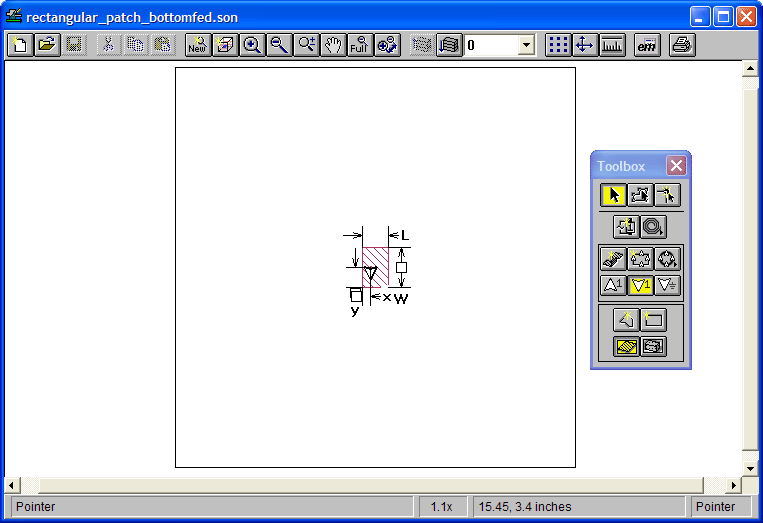
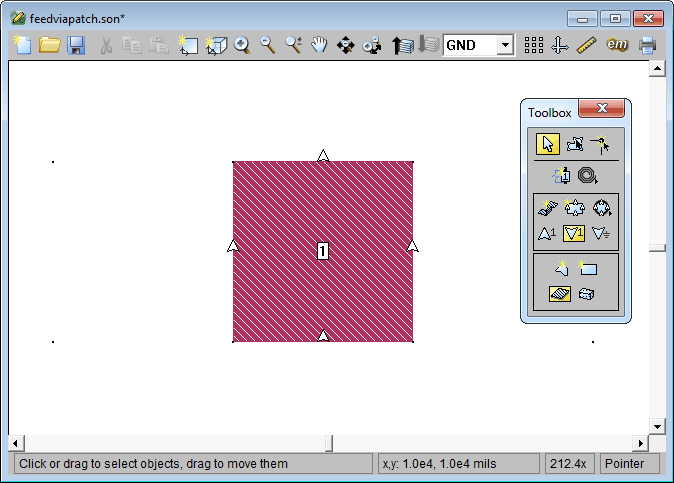
2D Top View - Close up
A close up view of the patch is pictured below. Note that the patch is simply a rectangular polygon and is fed by a via. Key dimensions of the patch are defined as parameters.

A via (a close up is shown below) connects between the lower ground plane and the patch. A Via Port (with 50 Ohms termination) is connected to the via to provide the excitation.
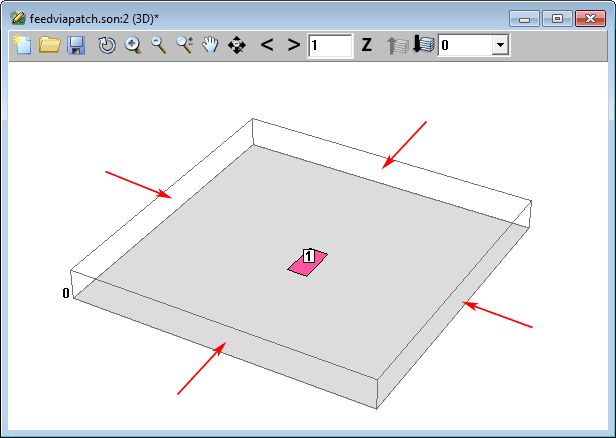
3D View
A 3D view of the patch is shown below. Keep in mind that all four sidewalls, highlighted by red arrows, are always perfect electric conductors ( PEC).
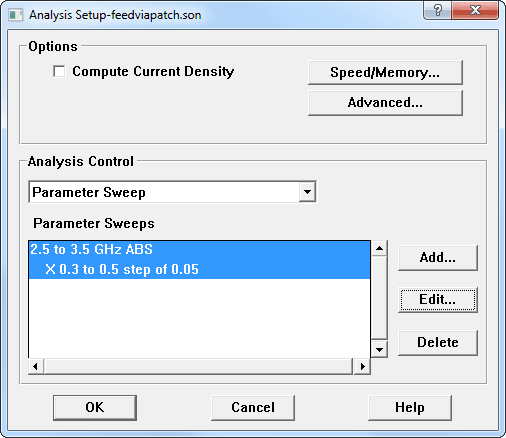
You set up your project analysis using the Analysis Setup dialog box (Analysis => Setup) pictured below. Since we know most of the dimensions, let's study the effects of the x parameter value using a parameter sweep.
TIP: Sonnet Lite is limited to a single parameter sweep. However, other parameters can be defined as long as they are held constant for any given analysis run.
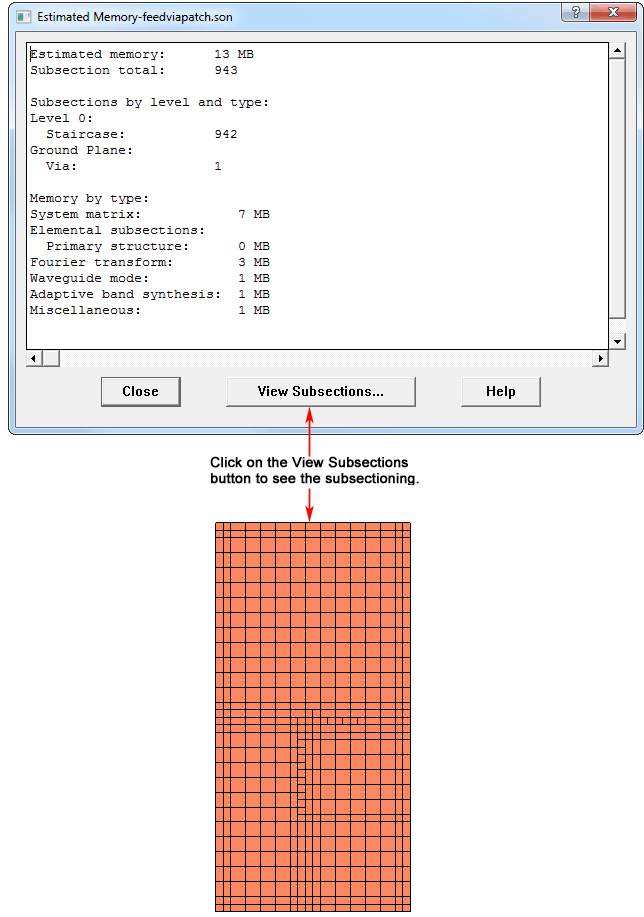
Estimate Memory and View Subsections
Once you have set up your analysis, you may use the command Analysis Estimate Memory to check the memory requirements for your analysis. A display window appears providing the memory requirements; clicking on the View Subsections button in this window displays the subsectioning that will be used to analyze your circuit.
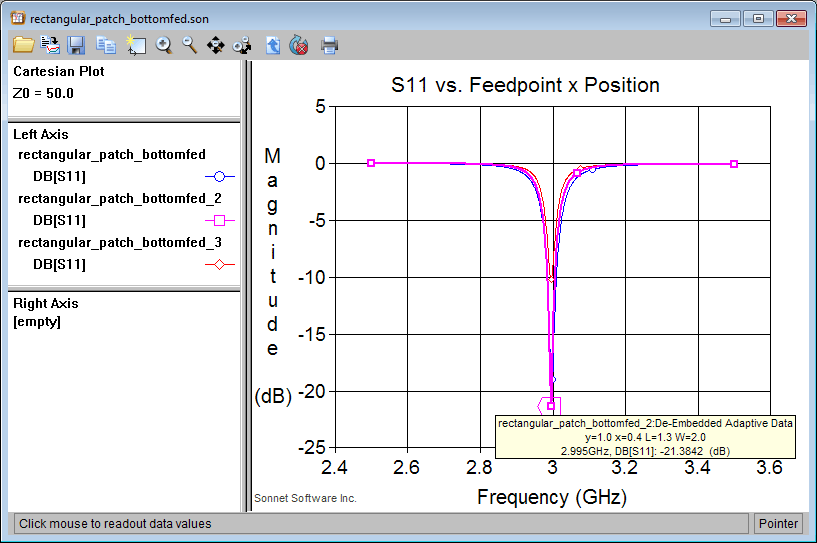
Once the analysis is complete, there are a number of ways to view your simulated response data. Pictured below is a plot in the response viewer of the S11 data at three different values for the x parameter. The X = 0.35" is shown in blue, the X = 0.40" is shown in magenta and the X = 0.45" is shown in red. The X = 0.40" (magenta) is the best value (for 50 Ohm input impedance) as predicted by the referenced handbook.
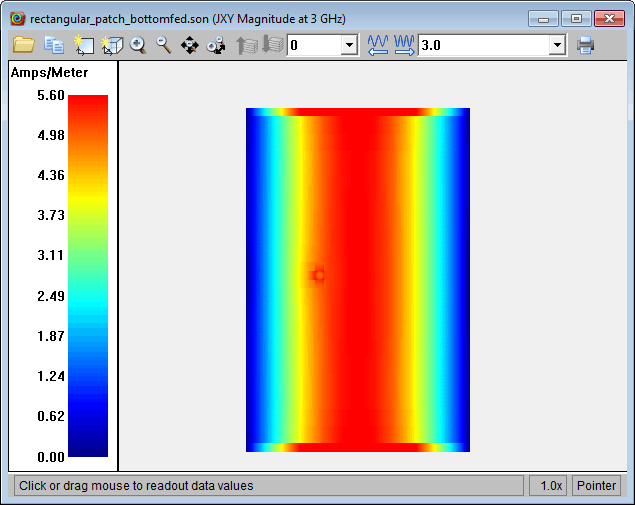
Current Density Pattern
The current density plot at 2.995 GHz (the minimum value of S11) is shown below.
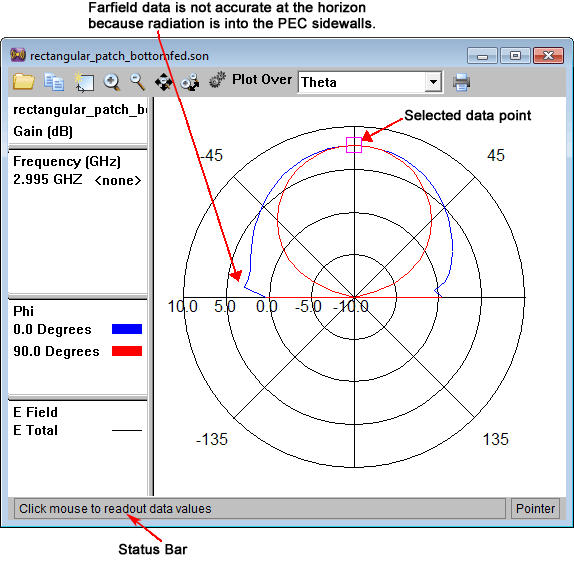
Far Field Data
The far field data is pictured below. Using the far field viewer requires the purchase of the Far field Viewer option. The gain is 7.8 dBi at 2.995 GHz with Theta = 0 and Phi =0. The status bar displays information on the presently selected data point in the plot.
Always keep in mind the Sonnet box while setting up a model, especially an antenna model.
Since the substrate is same size as the box, effects due to finite substrate size are not included in the model.
With this model we are approximating an infinite ground plane, so finite ground plane effects are also not included. It is possible to model a finite ground plane by inserting another air dielectric layer below the patch and drawing a ground plane polygon. This is definitely beyond the capabilities of Sonnet Lite.
To plot the far field data, you must purchase this option. It is not available for Sonnet Lite or LitePlus, but is an option starting with Sonnet Level2 Basic. Please visit our products page for more details: http:// www.sonnetsoftware.com/products/em/ suites.asp
There is a complete set of documentation (Help, Manuals, Examples, Tutorials, etc) available from the Help menu in any of the Sonnet program modules.
Reference: KB-5804