Measurement properties are defined using the right section of the Manage Curves dialog box. The appearance of this section is updated depending on the the type of graph (Cartesian, Smith, or polar) and type of measurement selected. An explanation of each of the possible fields is given below. Keep in mind that some fields will not be displayed for certain measurements.
Axis: Select the Axis upon which you wish to plot this curve: Left or Right. For example, changing the value from Left to Right immediately moves the curve from the left axis to the right axis.
Format: Select the format of the data from the drop list. Depending on the measurement selected, your choices may include all or some of the following:
File: Select the project file or data file whose response data you wish to plot. Any projects or data files that have been added to this graph tab appear in this list.
De-embedded: Most project files are de-embedded, so you should usually choose Yes. However, there are occasions where you may wish to view the non-de-embedded data, in which case you should choose No. Data files, project files which do not contain de-embedded data, and far field patterns will either provide you with only one choice or this field won't be displayed.
Interpolated: If a geometry project contains variables this field appears. If the project has variables but does not contain interpolated data, then the value is set to No and cannot be changed. For projects with interpolated data, if you wish to plot interpolated data, select Yes from the drop list.
Parameters: If the selected project contains variables, all of the parameter combinations available from the analysis are listed. If you wish to plot a single combination, you may select it from the list. If you wish to plot more than one combination, select <Select...> from the droplist, to open the Select Parameters dialog box that allows you to select multiple parameter combinations. In that case, a group is automatically created with a curve for each combination.
If your project contains optimization data, a choice labeled "<Best Opt Error>" will appear. This choice corresponds to the parameter combination that resulted in the smallest optimization error.
Note: If the parameter combination is truncated, you may need to resize the Manage Curves dialog box to read the complete parameter combination.
Multiple Data Source Sections: Most measurements require you to specify a single data source. However, some measurements (e.g., Difference), may require you to specify multiple sources. In those cases, there are multiple Data Source sections which may require you to specify information for each source.
Most measurements require one or more port numbers to be specified. For example, S-parameters require two ports to be specified. Some measurements require only one port to be specified, and some don't require any. For those that require two ports, you must specify a "To Port" and a "From Port". For example to specify S31, set the To Port to 3 and the From Port to 1.
Clicking on the Select button in the Ports heading opens the Select Ports dialog box which allows you to select multiple port combinations. A curve is created for each combination and a Group is created in the Curve list which includes all the newly created curves.
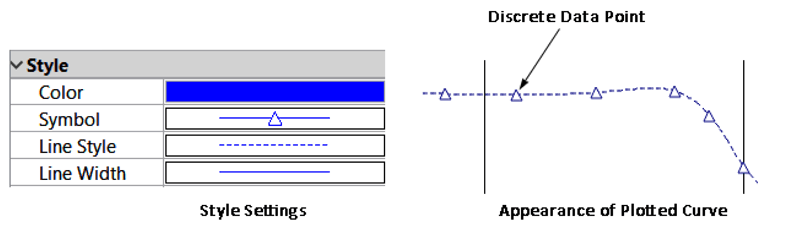
Style: The Style section of the properties allows you to define the appearance of your curve in your plot. You choose a color, symbol and line style from the drop lists. The line which represents your curve uses the color and line style chosen, while the selected symbol is used to identify discrete data points. An example is pictured below:
If you wish to limit the frequency range of a curve on a Smith chart, you may specify a lower and upper frequency. Only data points which fall within this range will be displayed. The default for both fields is None, which means all available frequencies are displayed.