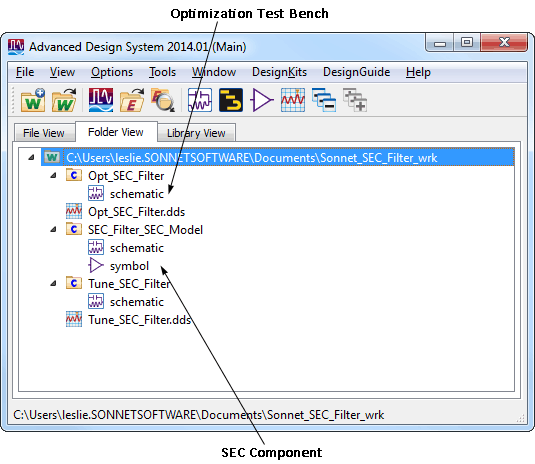
An optimization test bench, Opt_SEC_Filter, has been provided in your example. The Optimization goals are already set up.
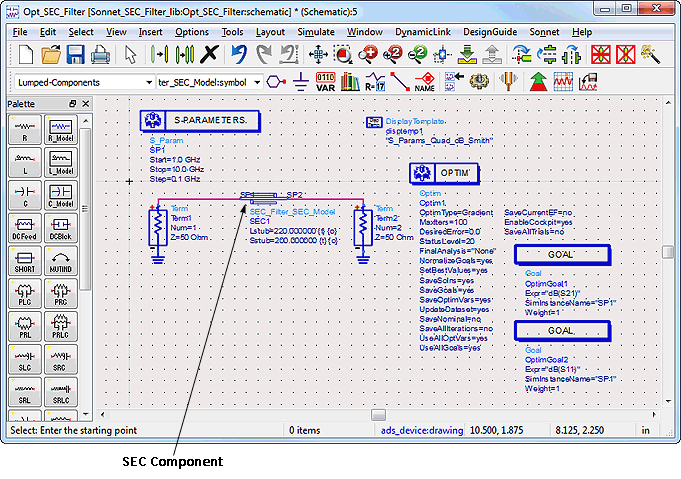
The Opt_SEC_Filter schematic appears on your display.
You may drag the component from the main ADS window into the schematic window, then place it in the gap.
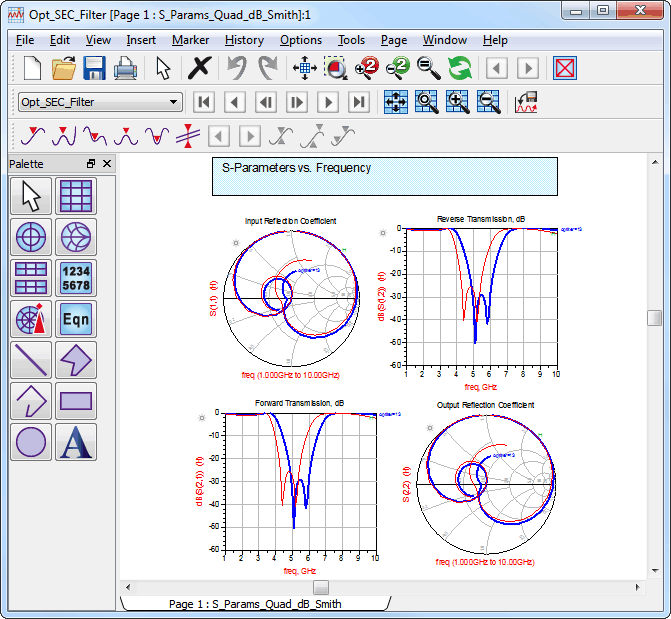
The data display window appears in your display.
With the history on, all the calculated data is displayed and you may see the data added as the optimization progresses.
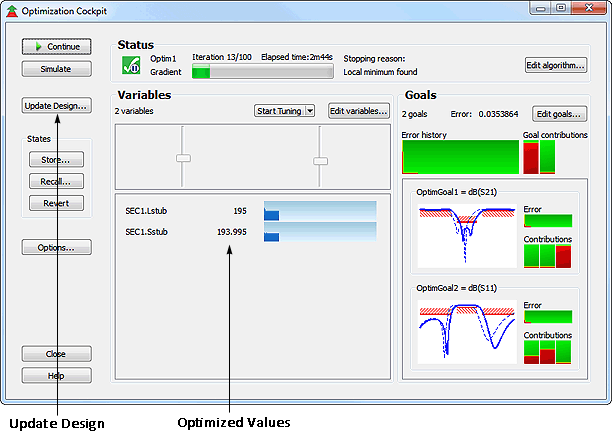
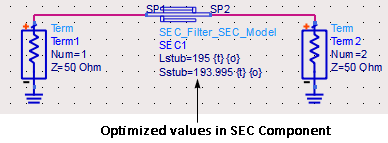
The ADS Simulation Status window and Optimization Cockpit are opened on your display. The simulation window displays status messages from both ADS and Sonnet as the Optimization progresses. You may watch the progression of the optimization in the Optimization Cockpit. When the optimization is complete, the optimized values for Lstub and Sstub from the SEC Component are displayed.
The data display should appear similar to below when the optimization has completed.
A query window appears to ask which items to update.
The schematic is updated. Notice that the SEC component now displays the optimized values for the two variables.
This completes the Sonnet EM Co-simulation (SEC) tutorial.