These instructions are for users who are loading in Sonnet on a Linux platform. You may do the installation remotely.
All users, both previous and new, require a new license. This is true even if you are upgrading from a beta version of this release. You may request a license from the Sonnet web site:
www.sonnetsoftware.com/license
Follow the on screen instructions to request your license.
In response to your license request, Sonnet will email licensing information which allows you enable your software. Once you have received your licensing information from Sonnet, continue the installation at Installing the Software.
Sonnet may only be installed on 64 bit systems, 32 bit systems are not supported.
Please verify that your system meets all the prerequisites prior to installing Sonnet. For a complete list of system requirements please visit:
https://www.sonnetsoftware.com/requirements
You may run the installation of the software from any directory you wish; just substitute your pathname in place of “/tmp.” To load in the software, do the following:
NOTE: The software does not need to be loaded in using root. However, we suggest that you use root so that users are prevented from changing or removing the Sonnet modules. The software may be loaded under any account.
tar xvf sonnetsuite.<version>.linux64.tar
where <version> is the version number of the software you are installing. This will create a sub-directory called “sonnetsoftware.”
The sonnetinstall script requires qt5-qtbase for X86_64 to be installed. Please verify this is installed on your system before performing the next step of running the sonnetinstall script.
./sonnetinstall
Then follow the screen instructions. You may install the software in any directory you wish; enter the desired pathname when prompted by the installation script.
To execute the software, you must first define the environment variable, SONNET_DIR, to the directory where you loaded in the software, then add the directory, “$SONNET_DIR/bin”, to your PATH. Also, Sonnet is a graphical program and requires that you define your DISPLAY variable.
NOTE: In the instructions below, replace <Sonnet Directory> with the name of your Sonnet directory.
You do not need to set your DISPLAY if the DISPLAY is already set.
csh users: If you are using csh, then you should have the following lines in your “.login”:
setenv SONNET_DIR <Sonnet Directory>
set path=( $path $SONNET_DIR/bin )
setenv DISPLAY :0
After updating your “.login” file, log out of the system, then log back in to activate the changes.
sh, ksh, and bash users: If you are using sh, ksh, or bash, then you should have the following lines in your “.profile”:
SONNET_DIR=<Sonnet Directory>; export SONNET_DIR
PATH=$PATH:$SONNET_DIR/bin; export PATH
DISPLAY=:0; export DISPLAY
After updating your “.profile” file, log out of the system, then log back in to activate the changes.
The license is used in conjunction with the license manager to determine which products you are authorized to use. You must have a license to run Sonnet Suites.
You should have received your license information in response to the License Request form you sent to Sonnet. Your license information should have been sent in an e-mail.
Please follow the instructions in your email to install the license file. Once the license file is installed, continue with Starting the License Manager.
Before you can run the Sonnet programs, you must start the license manager daemon, lmgrd. The lmgrd program will start-up the Sonnet vendor daemon, sonnetd. You can have only one Sonnet vendor daemon running on a particular license server.
NOTE If your license server uses a firewall, the firewall must be configured to allow the two licensing programs, “lmgrd” and “sonnetd” to execute. Please see your system administrator for instructions on configuring your firewall.
Start the license manager on the license server.
Type:
bin/sflexnet start
Typically, you will want to start up the license manager daemon each time you reboot the server. To do this you must make a change to your system startup files to start up the license manager daemon automatically on bootup. If you are upgrading to a new release of Sonnet Suites then these changes may have already been made. If you wish to use FLEXnet commands directly to start up the license manager then see Starting FLEXnet Using lmgrd.
NOTE: In the instructions below, replace <Sonnet Directory> with the full path to our Sonnet directory.
To change the startup files on your system, so that the license manager daemon automatically starts when you reboot the server, you should run the program soninstallservice. For instructions on running this program, type:
cd <Sonnet Directory>
bin/soninstallservice -h
where <Sonnet Directory> is the name of the directory in which you installed Sonnet Suites.
You may also use this utility to install the Remote em service. Please refer to Remote em Computing.
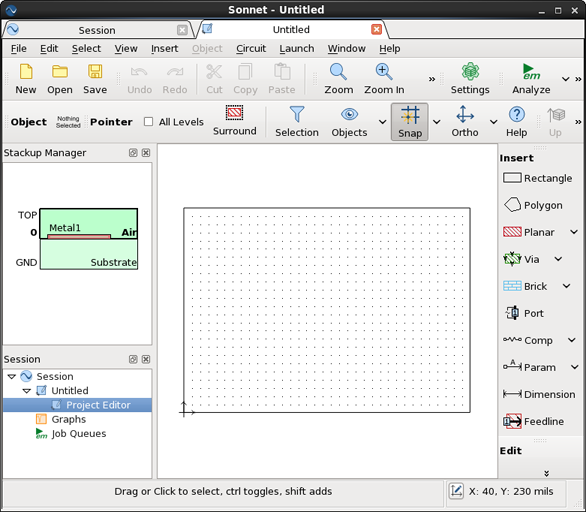
Test the installation by opening a New Geometry project in the project editor. To do so, perform the following
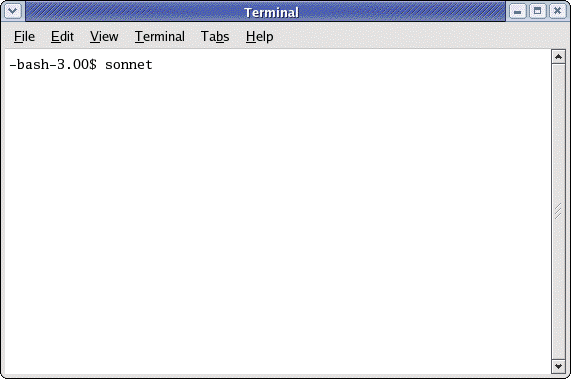
The Sonnet session window appears on your display.
![]()
If the installation was successful, this opens a Sonnet session window with a project editor tab displaying a new geometry file open as shown below.
OpenGL must be installed on each Linux platform where the project editor and current density viewer are executed. To verify if you have OpenGL installed, follow the directions below: If OpenGL is not installed then see your system administrator.
Run the following command:
glxinfo | grep OpenGL
If OpenGL is installed, you will see something like the following:
OpenGL vendor string: Mesa project: www.mesa3d.org
OpenGL render string: Mesa GLX Indirect
OpenGL version string: 1.2 (1.4 Mesa 5.0.2)
OpenGL extensions:
If OpenGL is not installed, then nothing will be displayed.