Since the analysis of this circuit requires a number of minutes, a copy of the translated project, including analysis data, has been included in your examples. If you do not wish to actually run the analysis, you may open the CT_spiral_analyzed.son project provided as part of your example files for the tutorial.
If you wish to perform the analysis, continue below.
- Click on the Analyze button
 on the project editor tool bar.
If you have remote servers defined, the Select Server dialog box appears. Select this computer for the analysis.
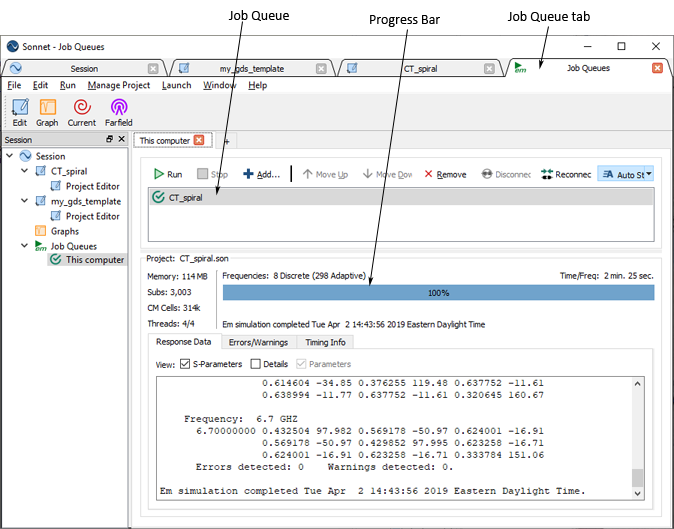
A job queue tab is opened with a new job queue. CT_spiral is added to the job queue.
- If your job queue is set to the default setting of manual, you will need to click on the Run button
 to start the analysis.
If the job queue tab is set to Auto, the analysis starts running immediately.
As the analysis runs, the job queue tab is updated with data as well as a progress bar that will be updated with an estimate of the percent complete. When the analysis is complete, the job queue displays the Job Complete icon  next to the CT_spiral entry in the job queue.
This completes the GDSII tutorial.