A dielectric brick simulates a volume of dielectric material. Because a brick simulates a volume, it must be subsectioned in the X, Y, and Z dimensions. The more subsections (finer resolution) used in each dimension, the more accurate the analysis.
X/Y subsectioning of dielectric bricks is identical to X/Y subsectioning of metal polygons. You can control the X/Y subsectioning of both through your choice of grid size, XMIN, YMIN, XMAX, YMAX, and subsections-per-lambda.
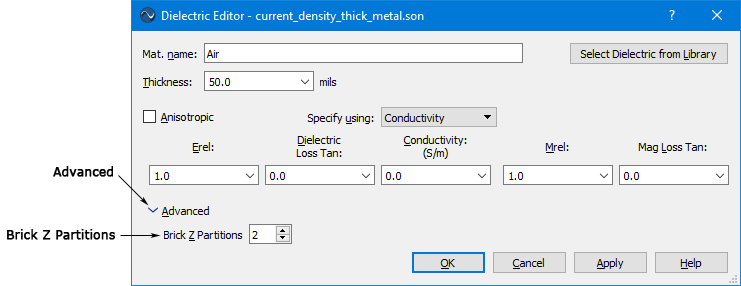
Z subsectioning of dielectric bricks is controlled by the Brick Z Partitions entry in the Dielectric Editor dialog box which is opened when you add or edit a dielectric layer on the Dielectric Layers page of the Circuit Settings dialog box (Select Circuit ⇒ Settings from the project editor main menu, then click on Dielectric Layers in the side bar menu of the Circuit Settings dialog box which appears). You may enter a Z Parts value for each dielectric layer in your circuit. This parameter specifies the number of Z partitions for all dielectric bricks on a particular circuit level.
NOTE: This entry field appears in the Advanced section of the Dielectric Editor dialog box and does not appear by default.
The default for this parameter is zero so that you are forced to enter a value for this field. If you use a dielectric brick in a layer, and do not set the z-partitions, em reports an error and exits the analysis. You must enter a non-zero integer value for this parameter in order to run an analysis. The value of this parameter is highly dependent on your circuit design; therefore, Sonnet cannot determine a “reasonable” value. This is the reason we suggest you run a convergence test on your circuit to determine the best value for the Z-partitioning.
To set this parameter in the project editor, do the following:
