The Specify Model Options page of the wizard is displayed. This page allows you to define the sweep controls used for the Sonnet project when the simulation is run.
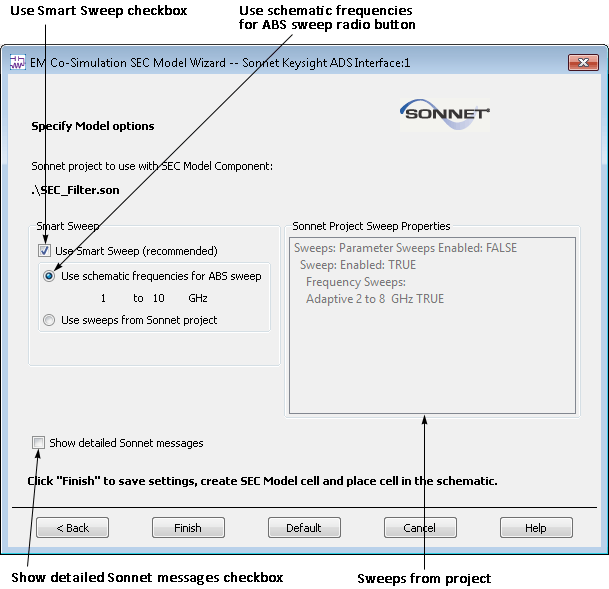
You can choose to use the sweeps set up in your schematic or use a smart sweep, the recommended method. The smart sweep uses either the sweeps set up in the Sonnet project, shown to the right of the radio buttons, or sets up an ABS sweep over the frequency band specified in the sweeps from your schematic.
If you turn Smart Sweep off, then a full EM analysis is run at each frequency specified in the schematic, and depending on the number of frequencies, can use significant processing time. An ABS sweep provides a fine resolution response for a frequency band requiring only a small number of full analysis points, so using a Smart Sweep provides response data at the desired values but is obtained with fewer full analyses. Smart Sweep is usually the most efficient way to obtain response data for your SEC model.
In our example, the frequency band defined in the project is from 2.0 GHz to 8.0 GHz, but the band in the schematic is from 1.0 to 10.0 GHz, so we need to sweep from 1 - 10 GHz to ensure we create the data we need for the simulation in ADS. In order to take advantage of the efficiency of ABS, we choose to use Smart Sweep. Since we wish to use the default setting, you do not need to change the Smart Sweep settings.
This option ensures that detailed status messages output from Sonnet are displayed in the ADS status window. If you do not select this option, you still receive higher level status messages from Sonnet.
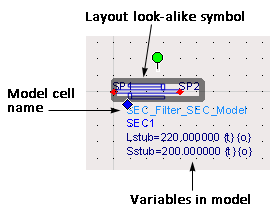
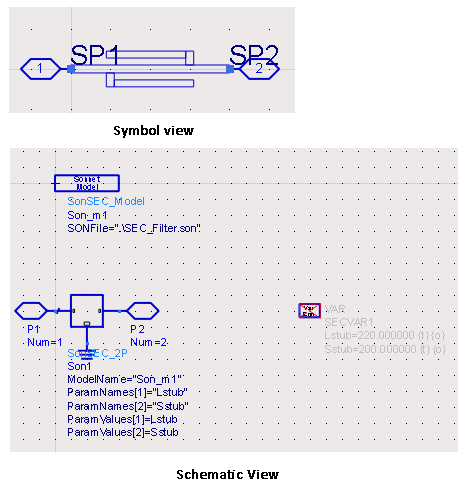
The wizard is closed and the SEC model cell is created and placed in your schematic. Notice that the variable's nominal value is displayed and each entry contains (t)(o) indicating that they are available for tuning and optimization.
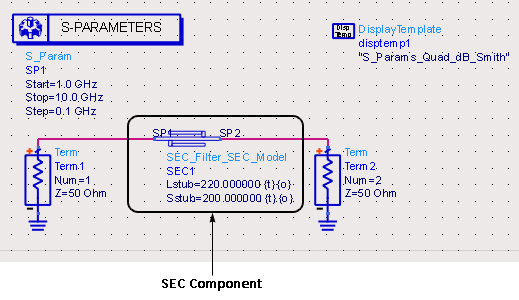
This completes the test bench circuit. You are now ready to run simulations in ADS that use the SEC component.
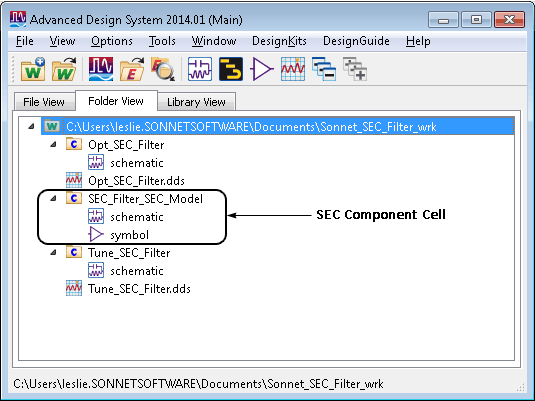
Now that you have created the SEC component, it is available in your workspace library and may be added to any schematic in your workspace. The new cell, SEC_Filter_SEC_Model, appears in your workspace directory and includes a schematic view and symbol view.
 After you have created the component, it is still possible to edit the project being used in the component and the SEC component's settings. To do so, you select Sonnet ⇒ EM Co-sim (SEC) ⇒ Edit Settings from the menu of a schematic which contains the component. The EM Co-Simulation SEC Model Wizard is opened with the project already specified. You complete the wizard in the same manner just specified, making any desired changes.