This Import Options page of the Import Wizard allows you to set options which control your box size, cell size and via properties. The box size may be set based on your template file or on the size of the circuit being imported. Because a template project was used during the input, the Box Size and cell size default to the settings in the template.
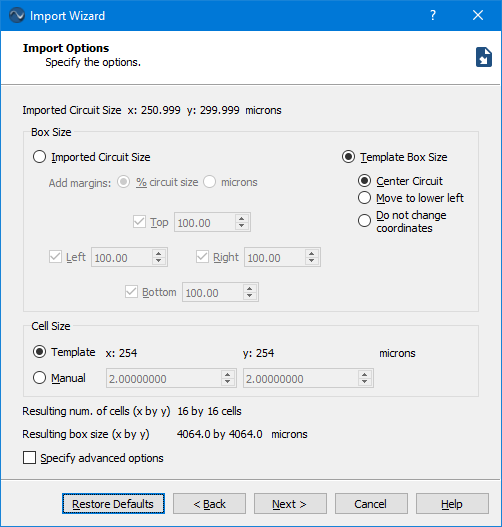
The box size needs to be big enough to prevent coupling between the metal box walls and the circuit but not so big that you cause box resonances. For an inductor, a good rule of thumb is to set the box size to three times the diameter of the inductor. So in this case, you set the import options so that the box size is based on the imported circuit size, since the circuit is the inductor. This makes even more sense in this case, since the box size was not modified from the default when you created the template file.
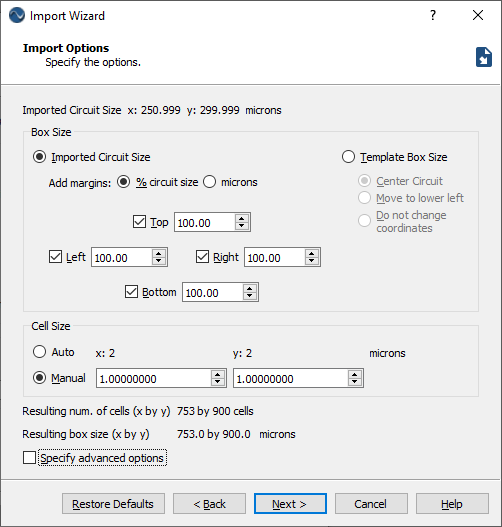
This enables the text entry boxes below the radio button, one for each box wall. If the Top, Left, Right and Bottom checkboxes are not already selected, then click on each to select it.
By entering 100 for each margin you set the box size to three times the diameter of the inductor, which as mentioned above, is the recommended box size when analyzing an inductor. Note that the resulting box size is displayed in the dialog box below the Cell Size section.
The Sonnet analysis engine, em, calculates the response data for your circuit by dividing the metal into small “subsections” and analyzing the coupling between these subsections.
The Sonnet subsectioning is based on a uniform cell size which is represented in the project editor by small dots. The small dots are placed at the corners of a “cell.” One or more cells are automatically combined together to create subsections. Cells may be square or rectangular (any aspect ratio), but must be the same over your entire circuit. Note that the cell dimensions do not have to be an integer nor do they have to be equal. For this circuit we will be using a 1.0 X 1.0 micron cell size. For more information about cell size, including how to determine the best cell size, please see Tips for Selecting A Good Cell Size in the Sonnet User’s Guide.
Selecting this option allows you to enter a cell size directly.
This sets the cell size to 1.0 micron by 1.0 micron. Note that when you change these values the Resulting Num. of Cells (displayed below the Cell Size section of the dialog box) is updated. If you decrease the cell size, the number of cells goes up so that box size remains the same.
The Import Options page should now appear similar to that shown below.
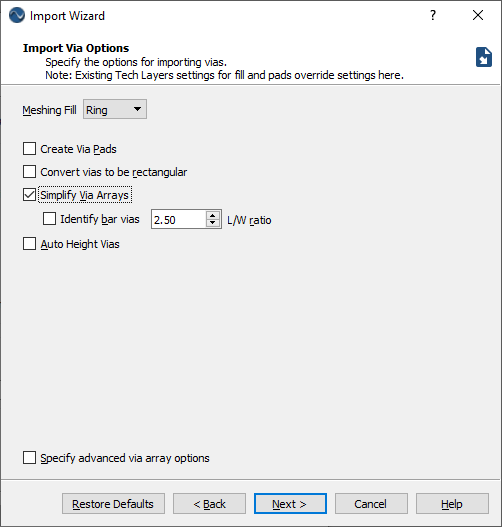
The Import Via Options page is displayed.
There are a number of via arrays in the GDSII file. The small size of the individual vias and the large number in the array can drive Sonnet model memory and analysis time requirements beyond what is practical to analyze. Sonnet provides a feature which automatically simplifies your via geometry by substituting a larger single via for an array. For a detailed discussion on simplifying via arrays, including the array options, please see Via Simplification.
This turns on the simplify via arrays feature. All of the controls associated with this feature are enabled.
The other default options are good for our import, so no further action need be taken.
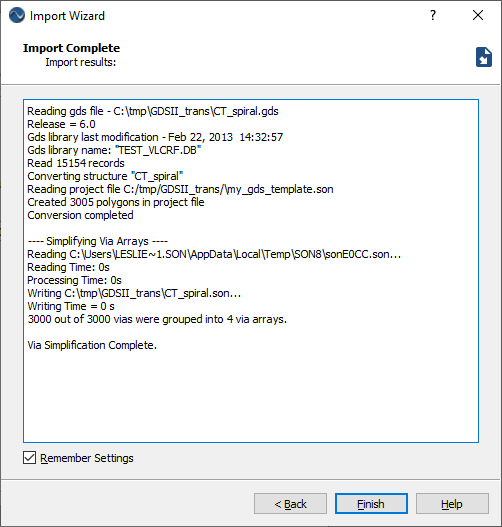
This executes the import of the GDSII file. The Import Complete page of the Import Wizard is displayed with information about the import. Note that via array simplification took 3000 vias and simplified them to four vias, greatly reducing the processing time necessary to analyze the circuit.
Selecting this checkbox saves all the settings input into the Wizard so that the next time you perform an Import, these settings are automatically input.
The Import Wizard is closed, leaving only the newly created Sonnet project open in a new Edit tab in the Sonnet session window.
![]()