This chapter contains instructions for installing the software on a client machine, when you have one or more floating licenses. With a floating license, you have the capability of installing the Sonnet suite locally while using a remote machine as the license server. In this case, you wish to install the software locally, but have a remote machine act as the license server.
You should first perform a full installation on the license server as described in Installation for Most Users. The hardware key should be attached to the server.
Once installation is complete and you have verified that Sonnet is operating correctly on the server, you must perform a local install on each client machine in the network on which you wish to make Sonnet available using the following instructions.
If this is the first installation of Sonnet on your system, you do not need to perform this step. Skip to Loading the Software.
If you are upgrading from a previous release, you may choose to uninstall the previous release or keep the previous release. We recommend that you uninstall previous releases to avoid future complications.
NOTE It is important if you chose to remove the older version, that the older version be removed BEFORE installing the new software.
Keeping the Previous Release:
If you want to keep an earlier version of the software, you may run your release 16 software using your release 17 license.
Note: If you have a university copy of Sonnet, you MUST remove any previous releases before installing this version.
Skip to Loading the Software.
Uninstalling:
Make sure that no Sonnet programs are running on the PC.
If you choose to delete the older version of the software, select ⇒ Sonnet 17.xx ⇒ Uninstall from the Windows desktop Start menu. The uninstall command will leave any files that you have generated as well as any directories that were created in the Sonnet directory.
NOTE: You must be logged in as the Administrator, or as a member of the administrator group, to perform the installation.
To install your software, run the file Sonnet installation file, “setup_sonnet17xx.msi” and follow the on-screen instructions.
Once the setup program is complete, continue with the next step.
To set up the license on the client machine and enable your software, do the following:
The Sonnet Administration dialog box with the License page selected appears on your display.
The License Server Hostname and Port Number entry boxes are enabled.
The default port number is 7852. If you wish to use another port, enter the value here.

Note that you must have administrator permissions in order to use this checkbox. Once you have applied this checkbox, all future changes in licensing will require administration permissions even if you are changing the license for only one user account.
NOTE You must configure your firewall to allow the two programs “lmgrd.exe” and “sonnetd.exe” to run. Be aware that if you are using a nodelock license, then the computer you execute Sonnet on is also your license server. Please see your system administrator for instructions on configuring your firewall. You should use port 7852 for “lmgrd.exe” and 7853 for “sonnetd.exe.”
Verifying the Client Install
You need to run the project editor to verify that your installation is complete and functioning correctly. To verify this, perform the following:
The Sonnet session window appears on your display with a session tab open.
A project editor tab should appear in the session window, with a new substrate, as shown below, with no error message.
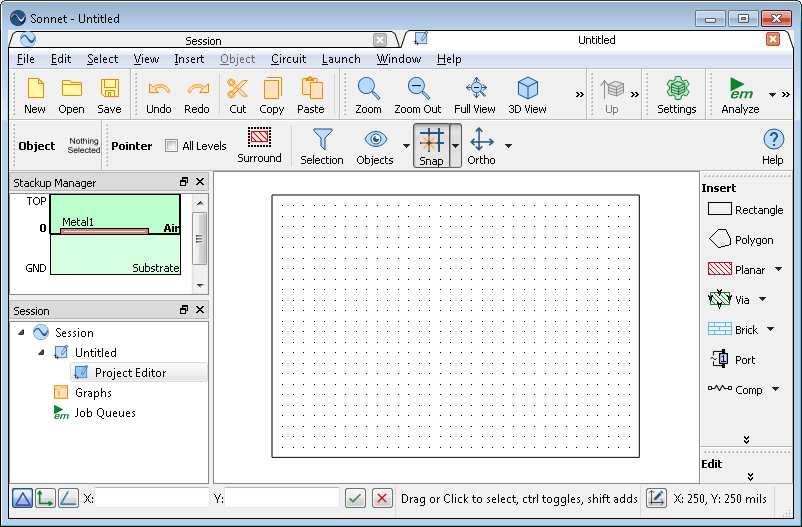
This indicates that the client installation is functioning correctly. You are now ready to run Sonnet programs.
If an error message appears while trying to bring up the project editor, please ensure that the licensing manager is up and running on the license server.
That completes setting up your client. If you are doing multiple client installations, you will need to do this procedure on each client.