To remove a Sonnet release from your machine, perform the following:
- Make sure that no Sonnet programs are running on the PC.
- Stop the license manager. For how to do this, see Stopping the License Manager.
- Turn “off” the FLEXnet license manager automatic start at power-up by selecting Sonnet 17.xx ⇒ Sonnet from the Windows desktop Start menu. When the Sonnet session window appears on your display, select Admin ⇒ License from the main menu of the Sonnet session window.
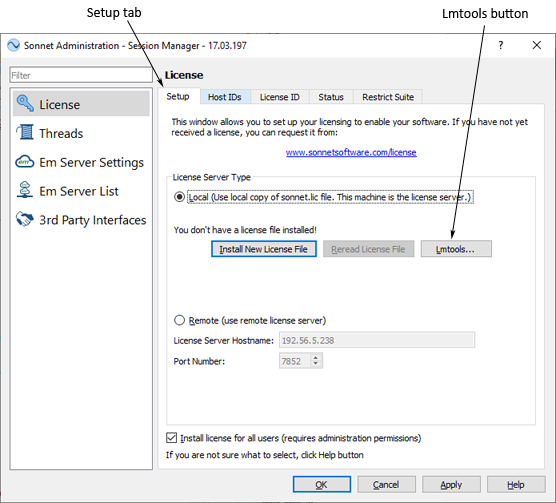
- The Sonnet Administration dialog box appears on your display with the License page selected. Click on Setup tab in the License page, then click on the Lmtools button. When the interface appears on your display, click on the Configure using Services radio button on the Service/License File page which appears when the Lmtools interface is invoked. Ensure that the correct service for this release of Sonnet is selected in the list below the radio button. Click on the Config Services tab of the Lmtools interface. Click “off” the Start Server at Power-Up option.
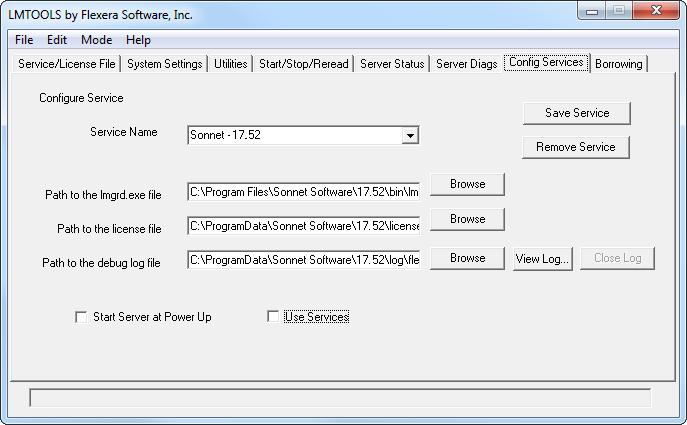
- Make sure the Use Services checkbox is disabled on the Config Services page of the Lmtools interface.
- Uninstall the previous release:
- Select Start ⇒ Windows System ⇒ Control Panel from the Windows Start menu.
- In the Control Panel which appears, click on "Programs and Features."
- Scroll down the list of programs and select the Sonnet version you wish to uninstall, then click on the Uninstall button at the top of the list.
The uninstall command will leave any files that you have generated as well as any directories that were created in the Sonnet directory.
The Sonnet directory, which was created as part of the installation, is not deleted because some files, such as the licensing file, were created after the installation. Because of this, uninstall reports that some elements could not be deleted.
Next